


Welcome to our first After Effects tutorial. Today, we will show you how to create a vertical transition between two clips.
First, import your clips into After Effects. You can insert your clips using drag and drop.
Next, trim your clips as desired. It could now look something like this.

Next, you should activate motion blur. Motion blur makes the transition look much smoother.

Now select the first clip. On the right, in the “Effects & Presets” panel, search for the “Motion Tile” effect. Double-click the effect to add it to your selected clip. Change the values “Output: Width” and “Output: Height” to 400. Now duplicate this effect onto all of your clips.

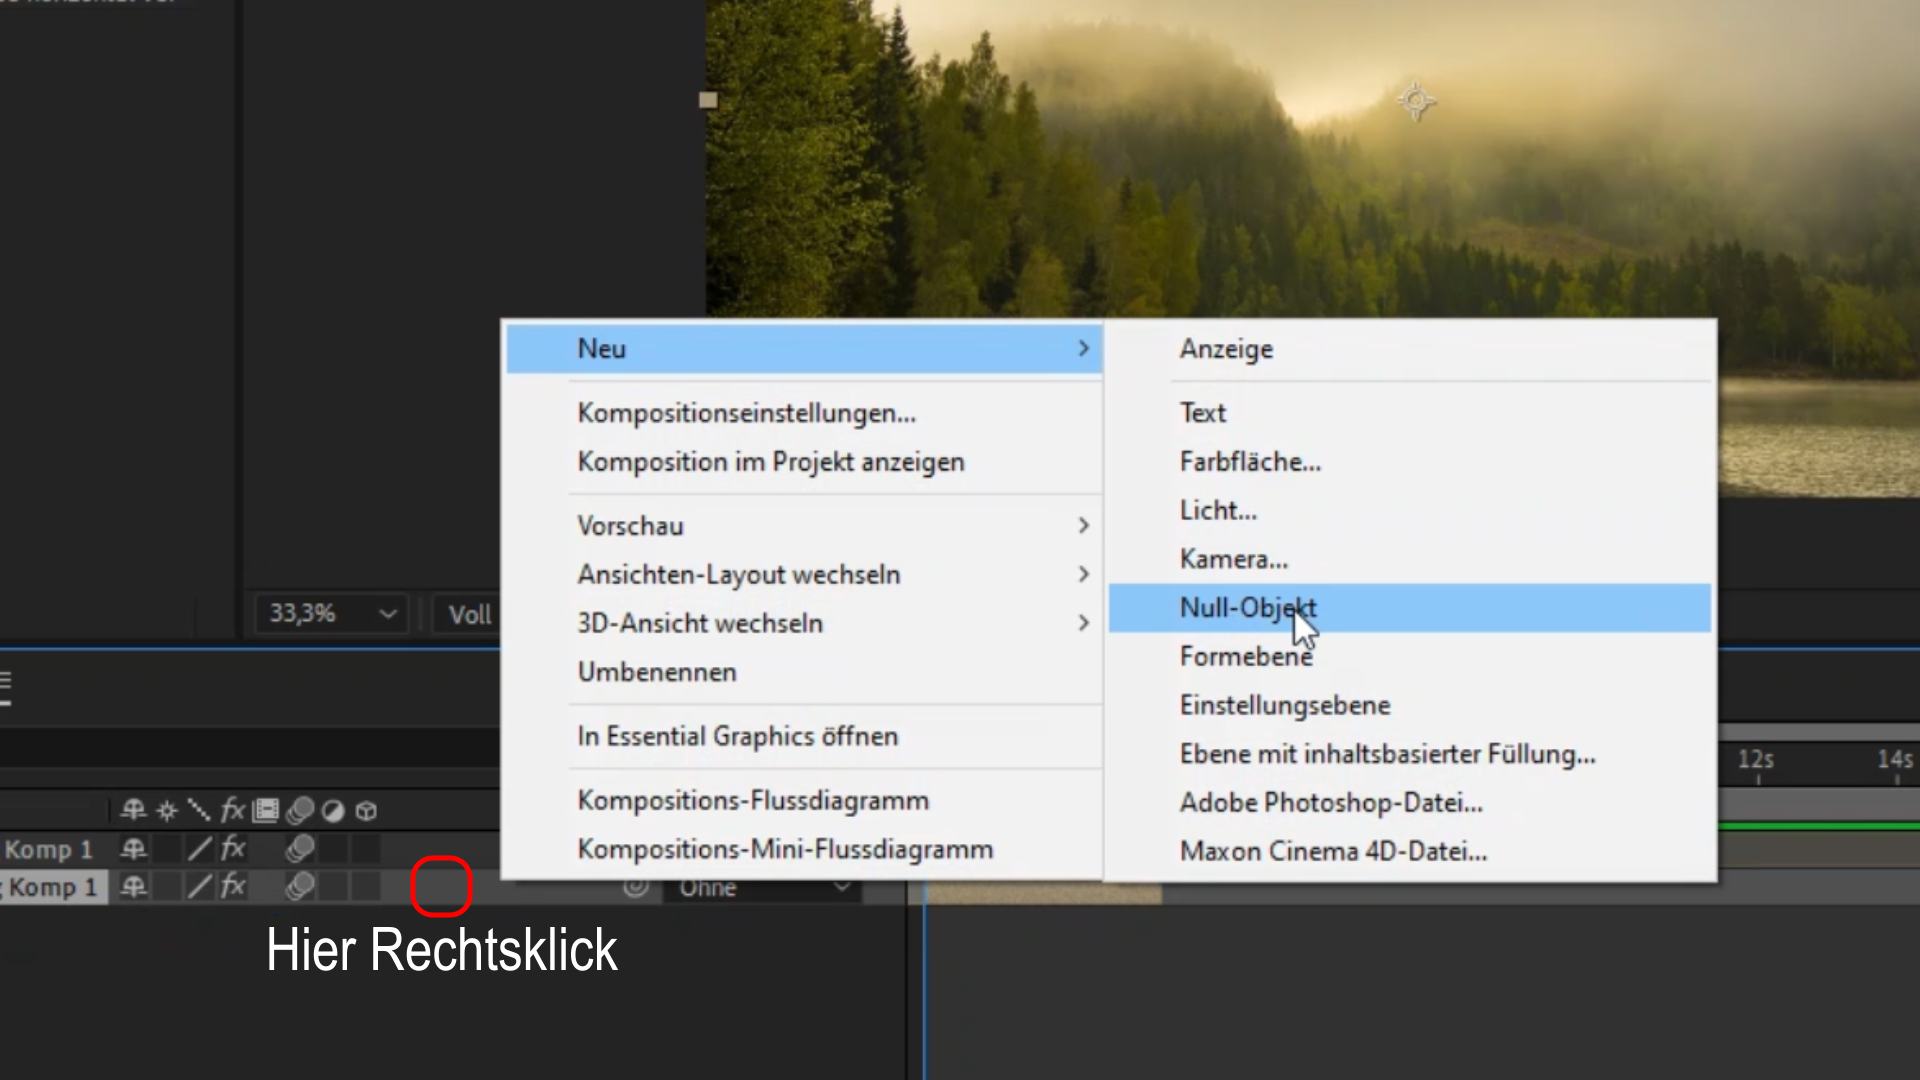
Next, we will add a null object. To do this, right-click in the highlighted bar. Then click “New” and select “Null Object”.
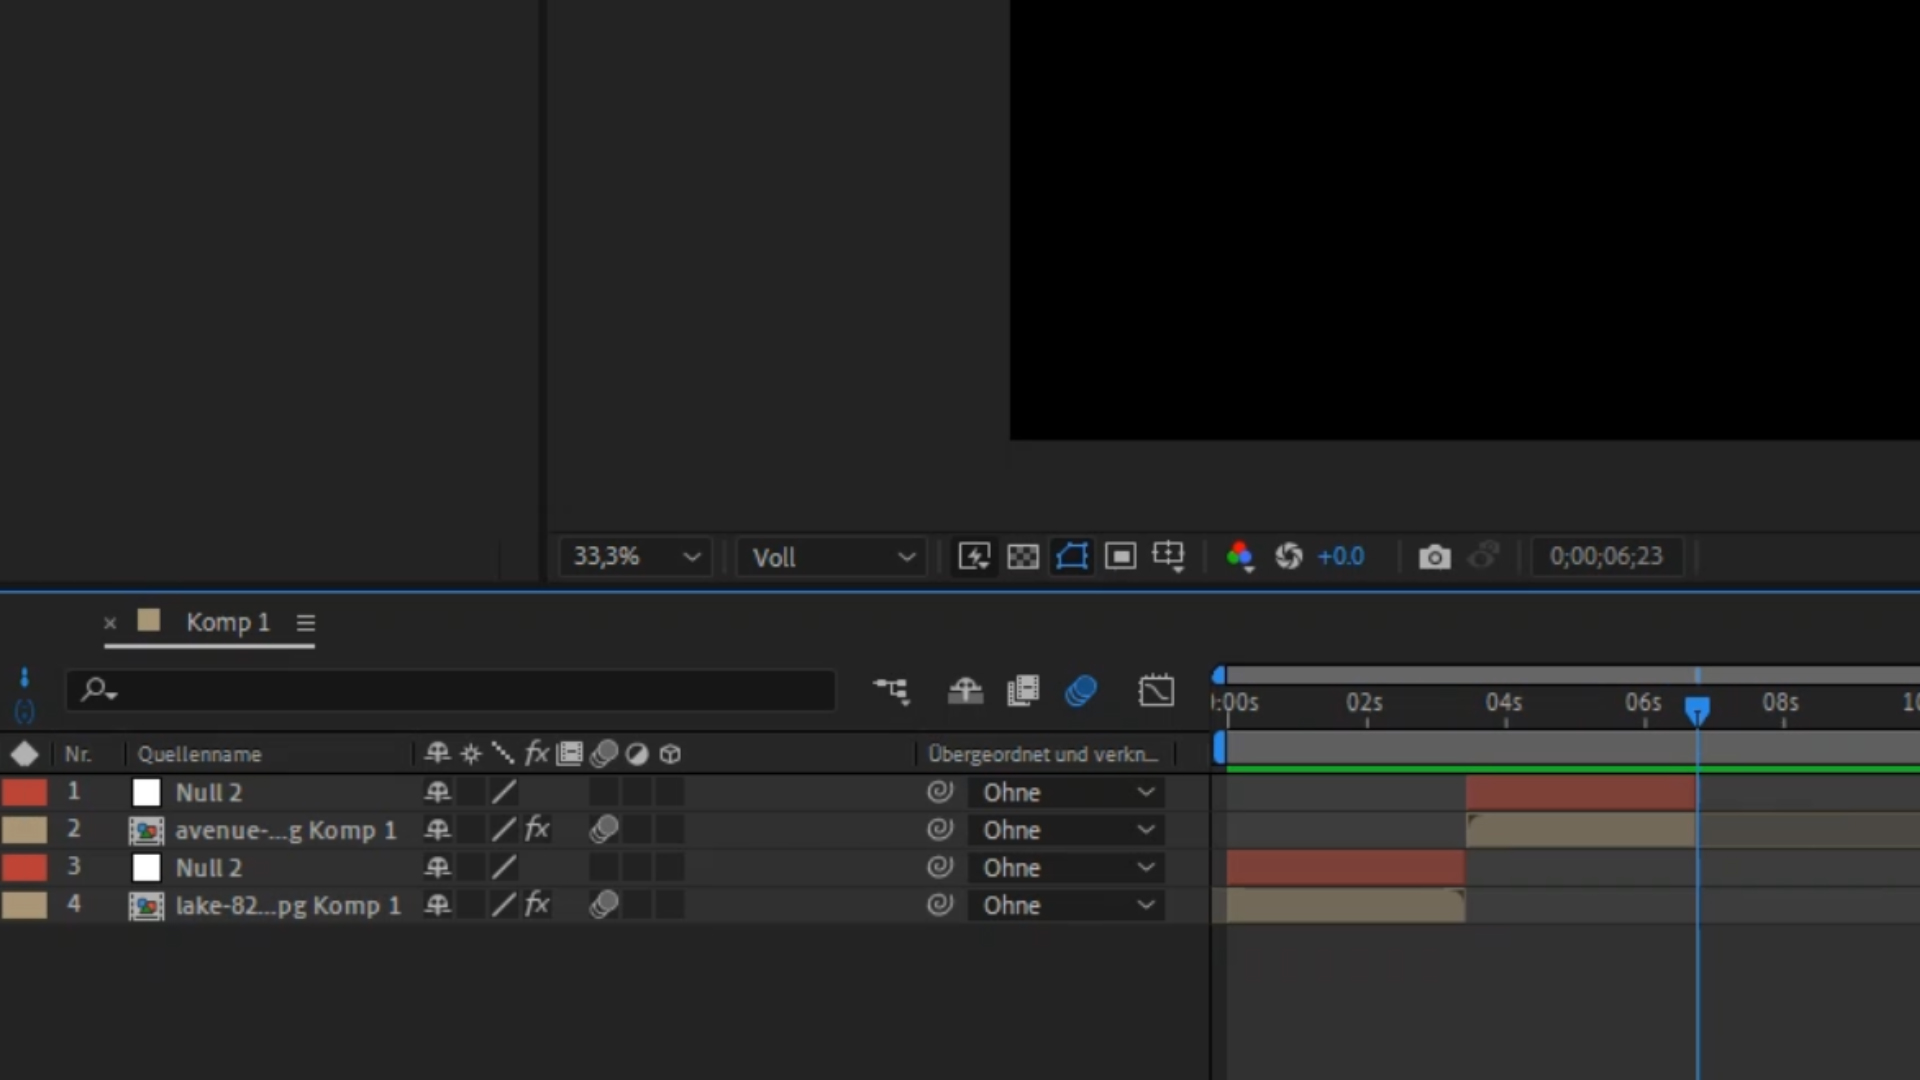
Trim your new null object so that it has the same length as your clips. It should now look like this (the null object is the red bar here).
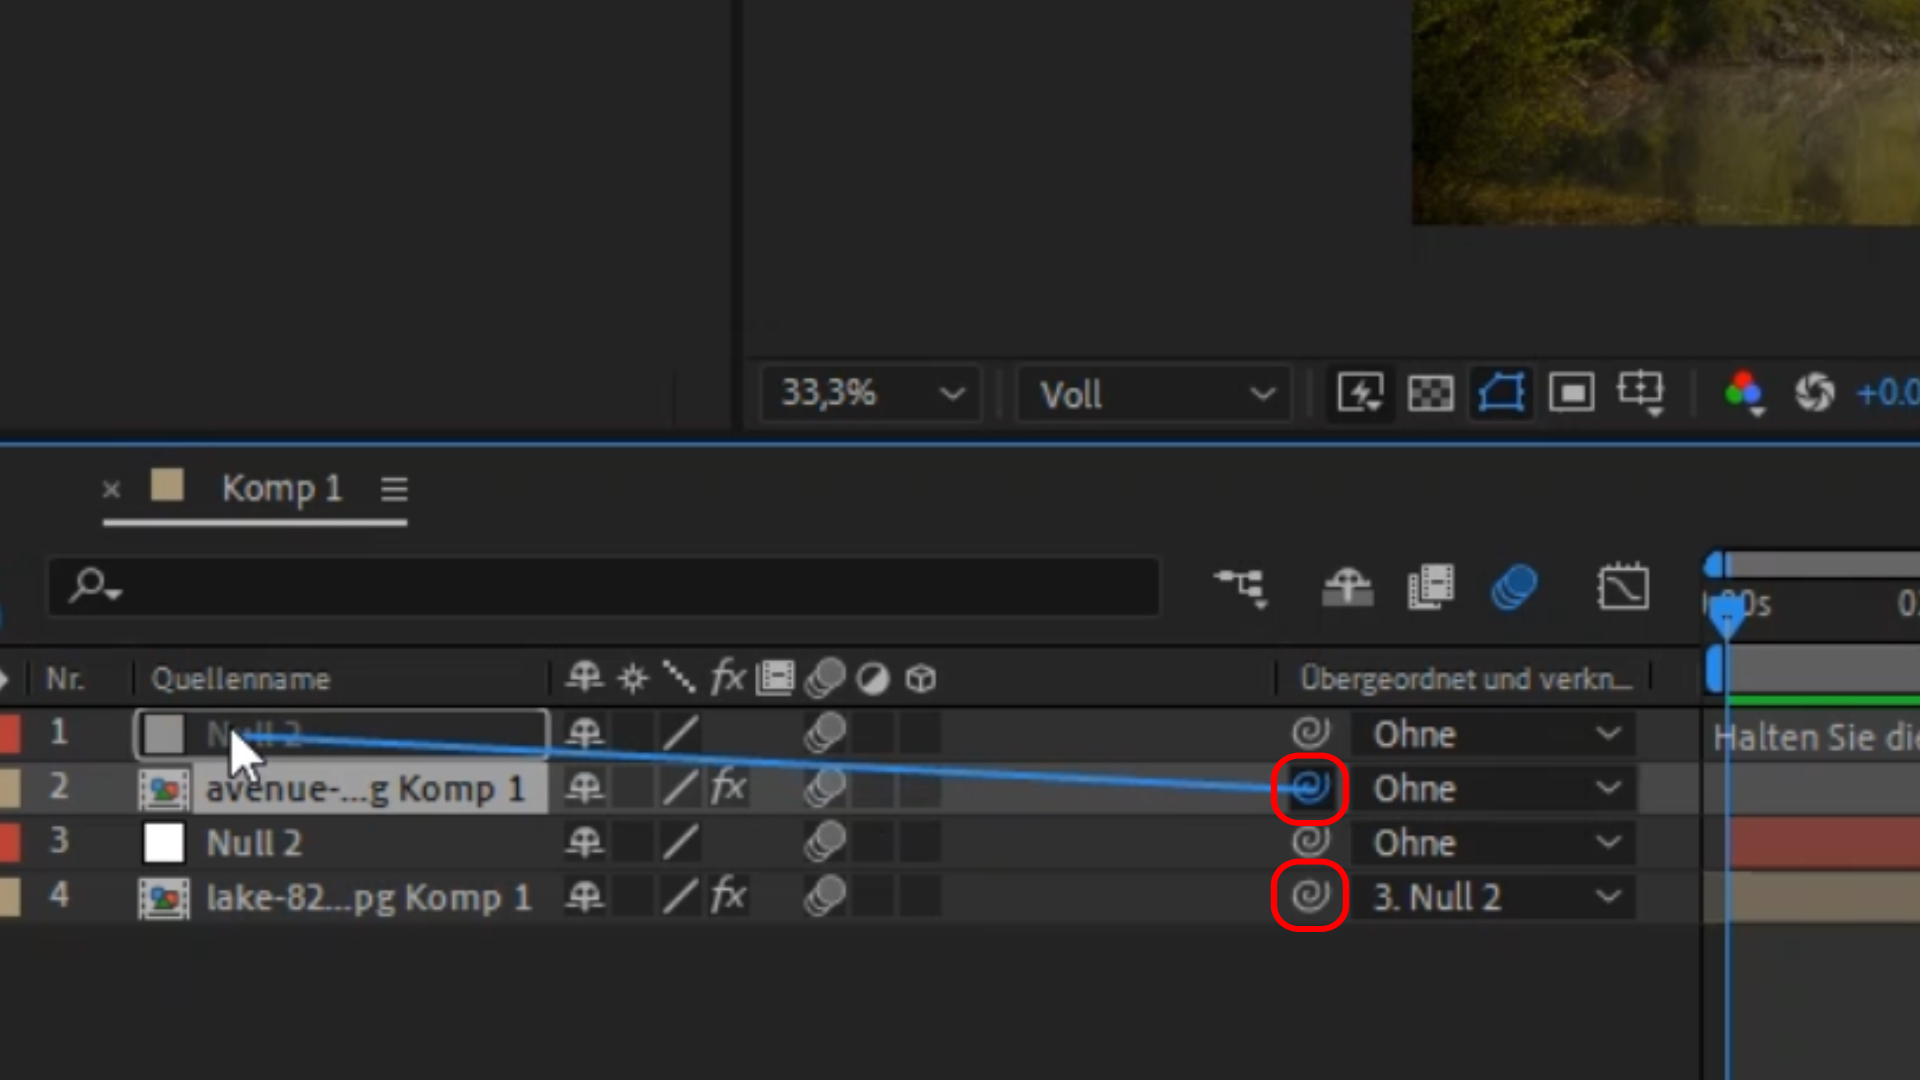
Now click the pick whip of the video clip (the beige bar here), hold it down, and drag your mouse pointer onto the null object. Repeat this for your second clip and the null object above it.
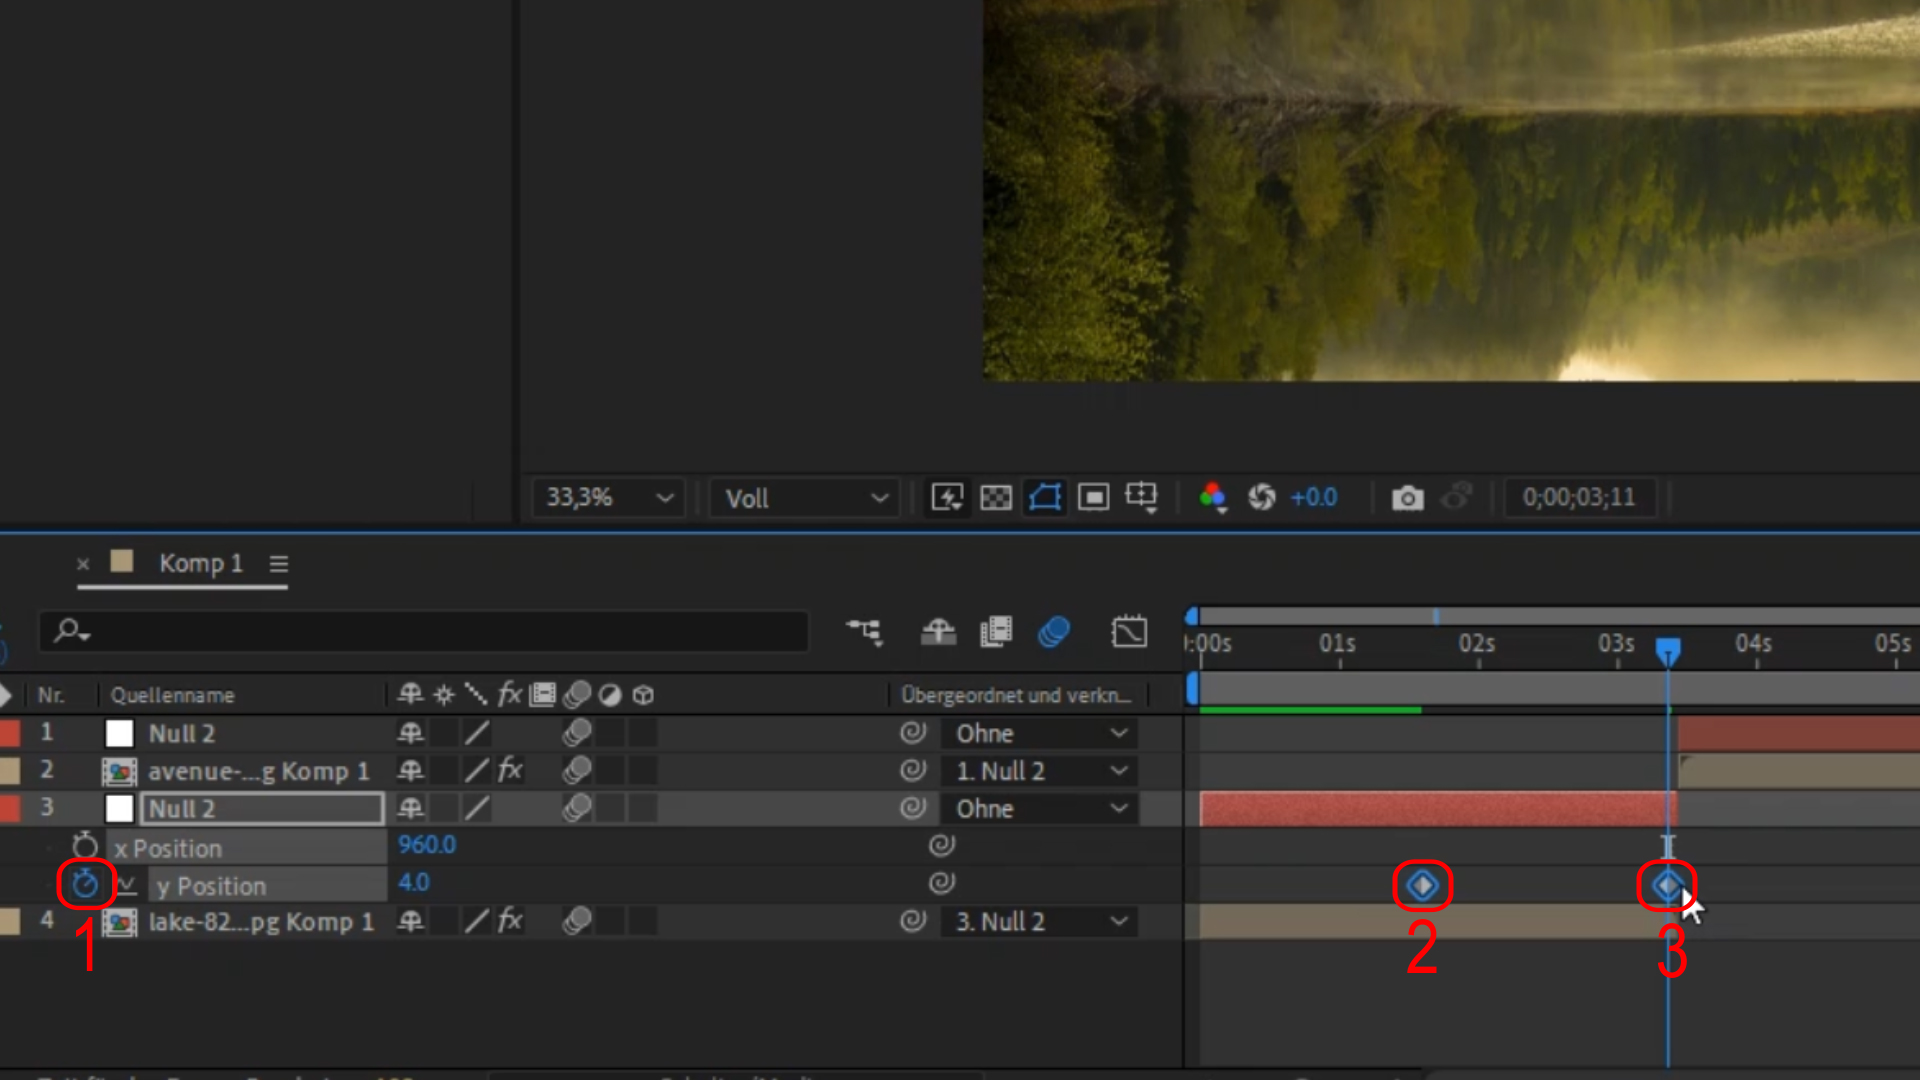
Now click on your first null object and press the shortcut “P”. This opens the Position property on the left. Right-click on the word “Position” and then click “Separate Dimensions”. You can now change the x and y positions independently. Click the stopwatch next to the y-position. It is marked with a 1 in the image. This creates a keyframe, which you should move approximately to the middle of your null object. Leave the value unchanged. This keyframe is marked with a 2 in the image.
Move your time indicator to the end of your first null object and change the value to 0. This creates the keyframe marked with a 3 in the image.
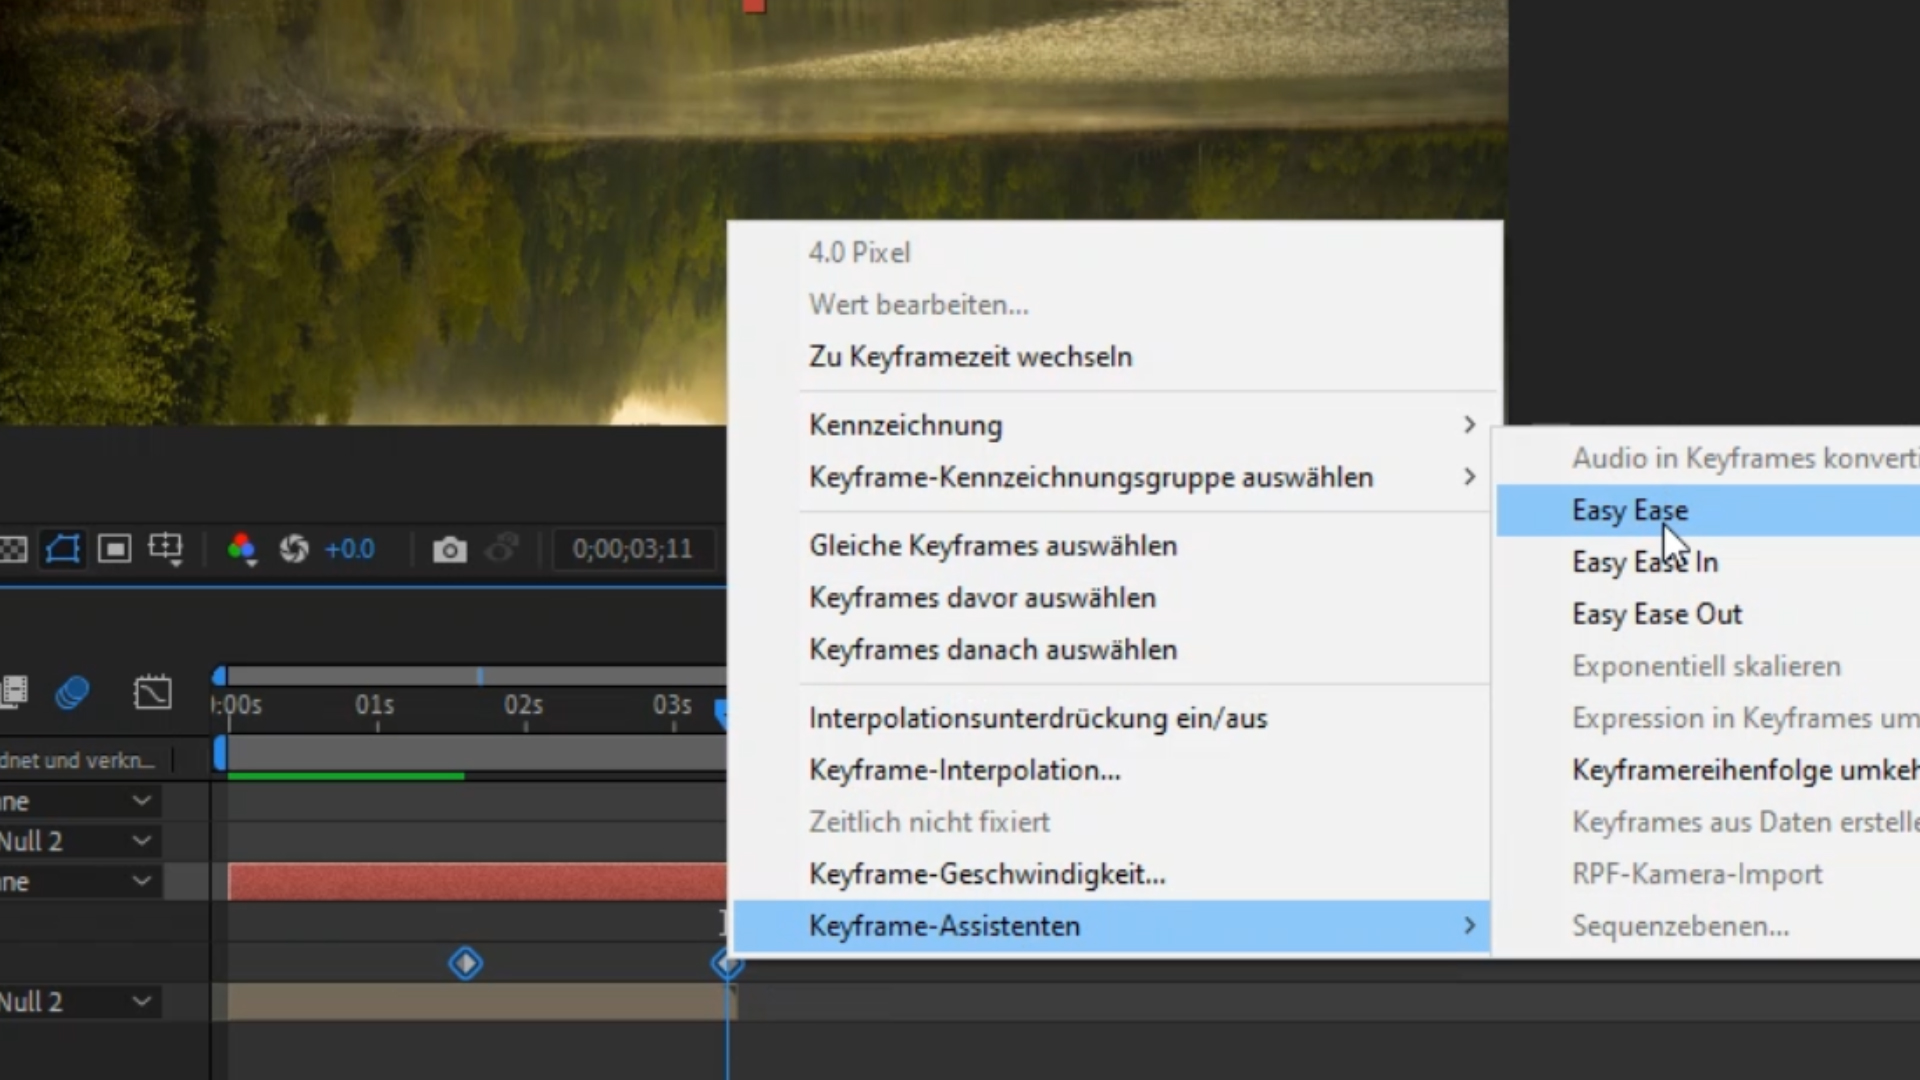
Select both keyframes. Right-click, select “Keyframe Assistant”, and then choose “Easy Ease”.
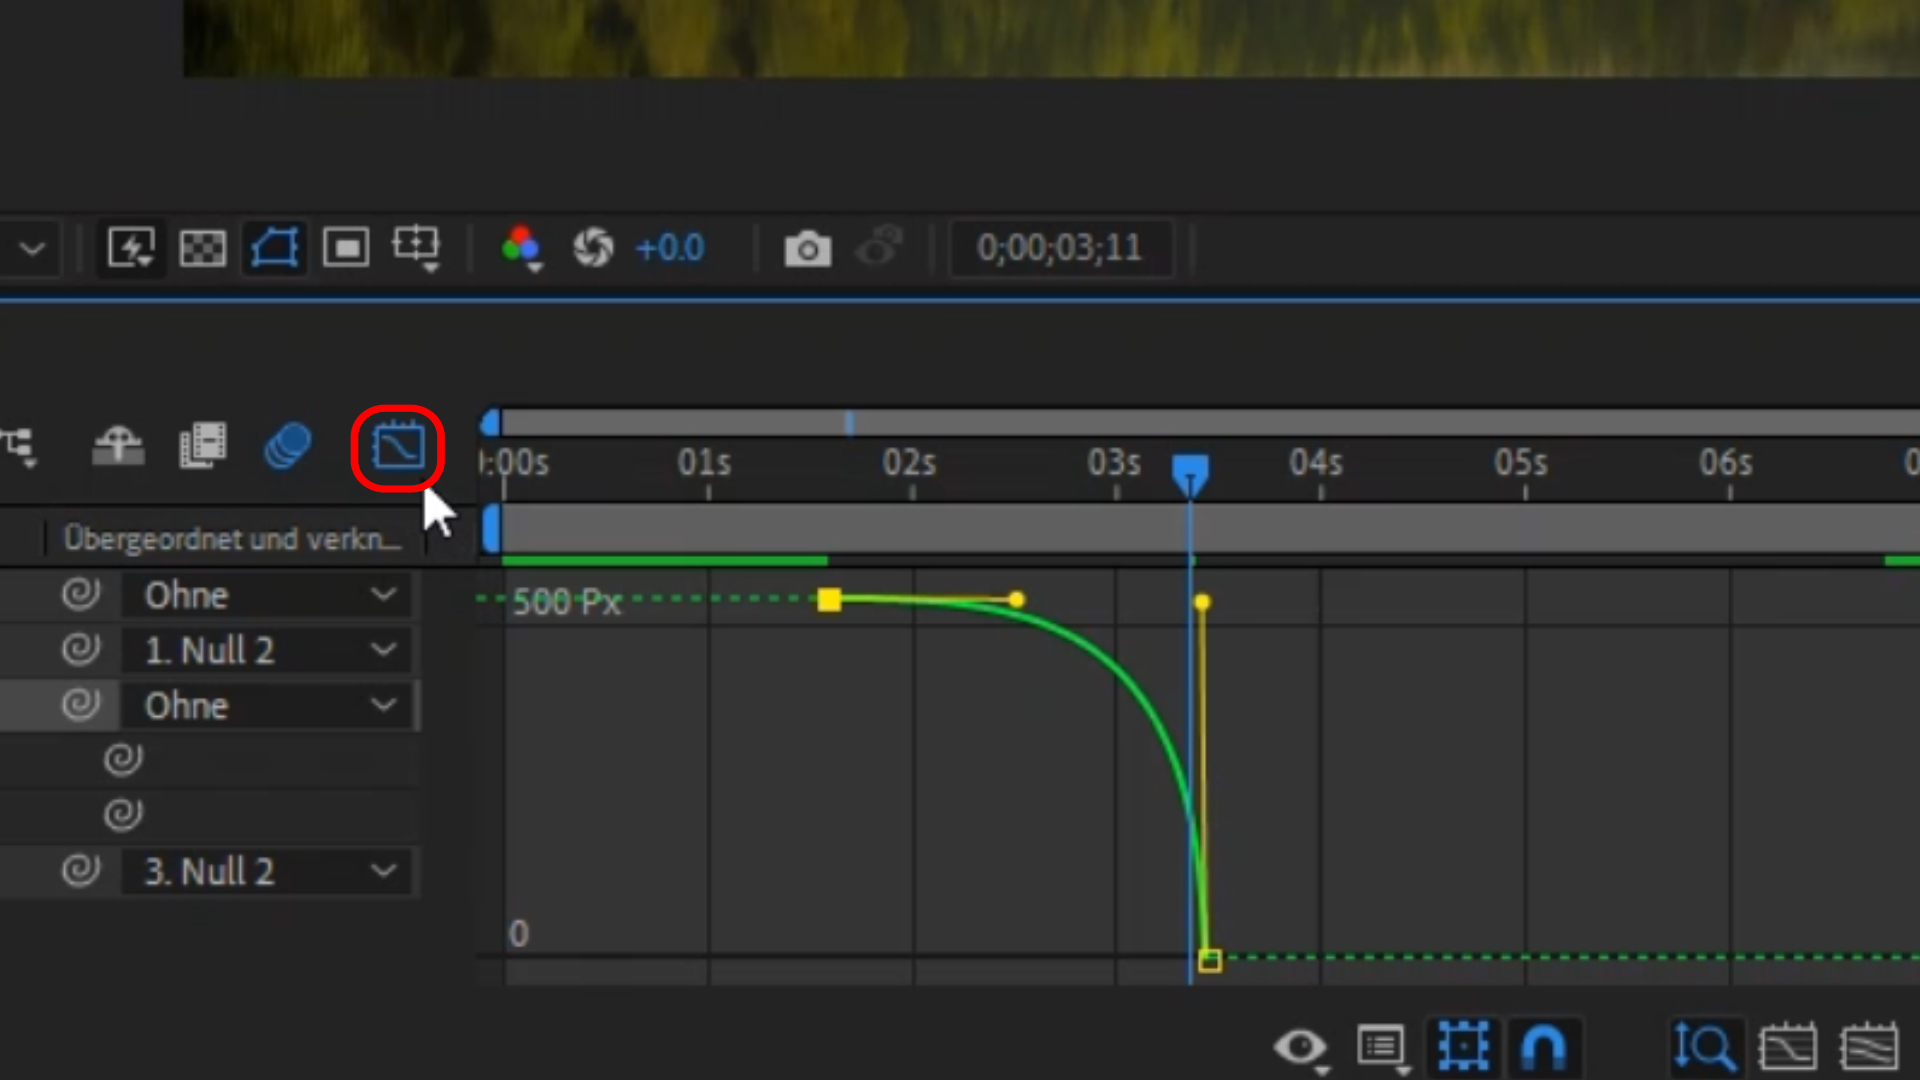
Click on the Graph Editor. It is marked with a red circle in the image. Then copy my graph.
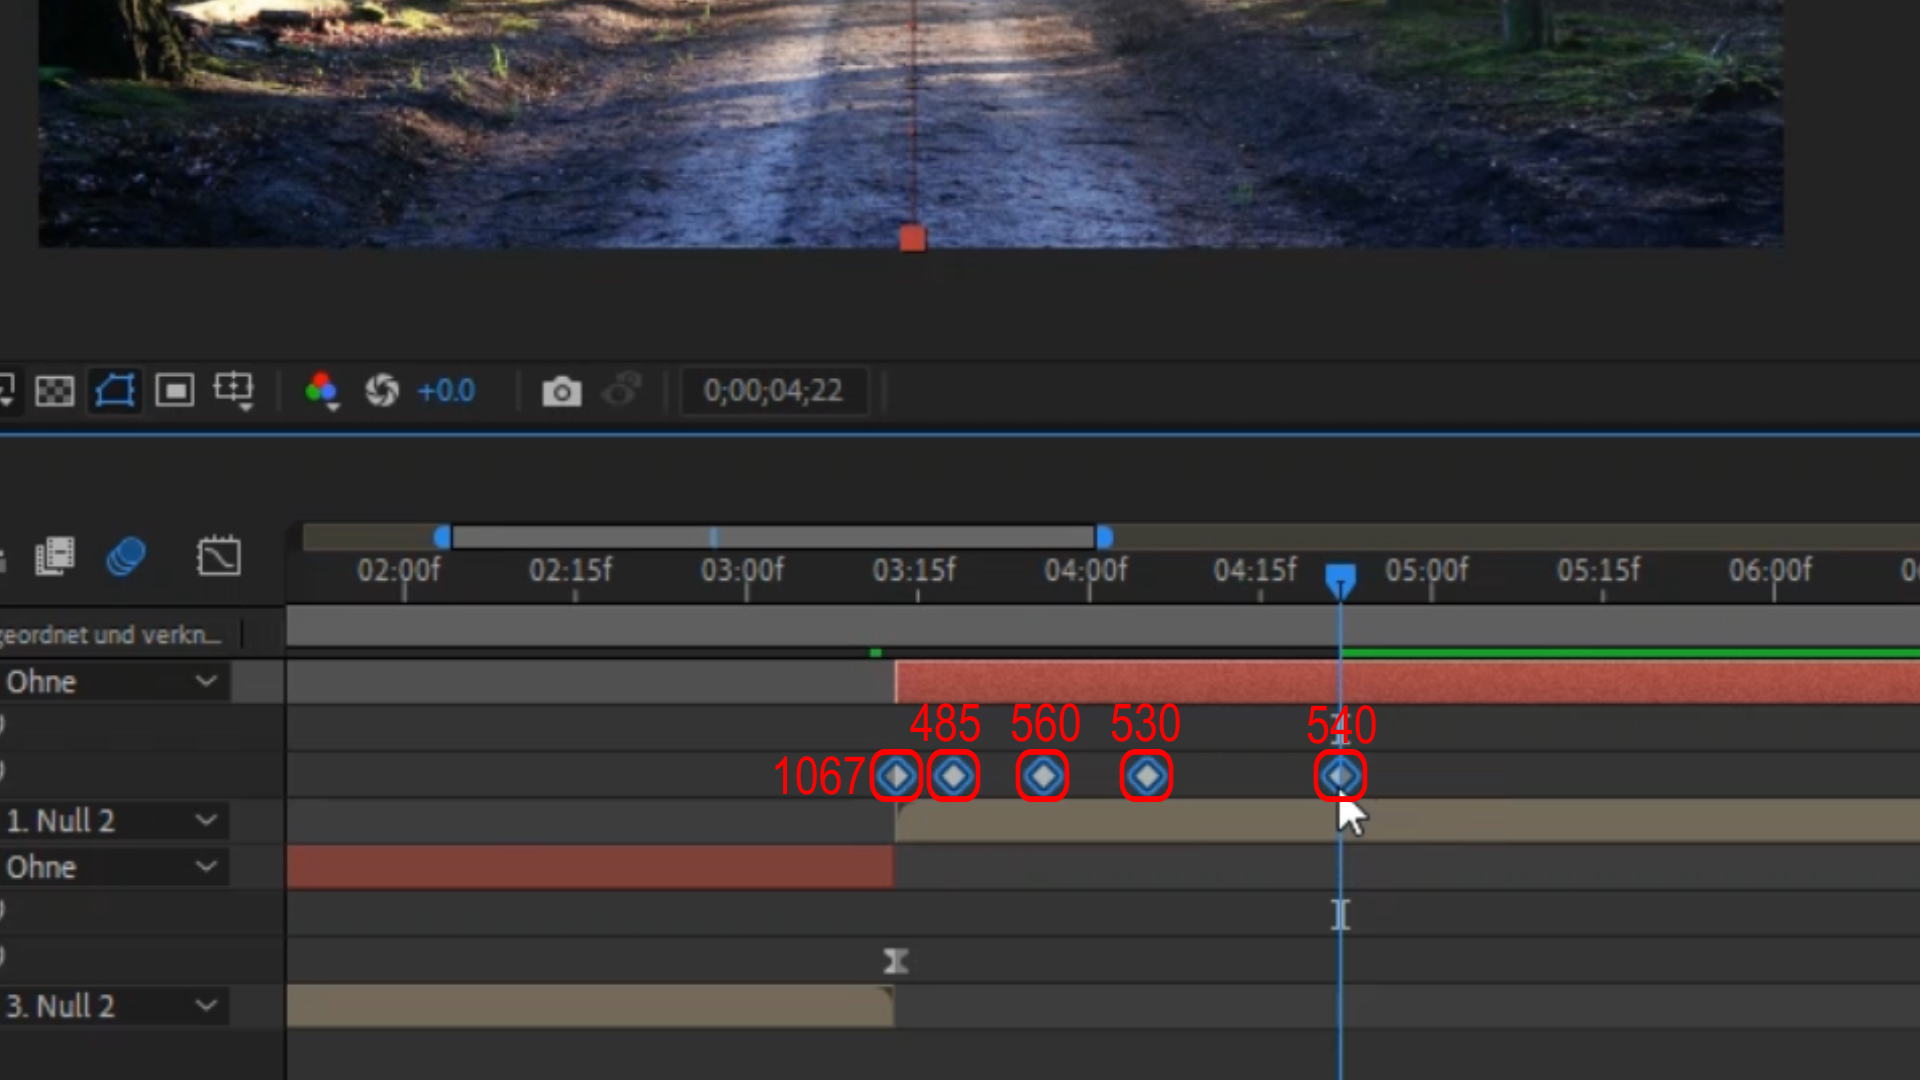
Now repeat the process with your second clip. Click on the second null object and press the shortcut “P” to open the Position property. Right-click on the word “Position” and select “Separate Dimensions” again. Now click the stopwatch next to the y-position again. Then copy the keyframes from the image. Make sure that the keyframes are approximately the same distance apart as shown in the image. You can copy the values or choose your own.
Select all the keyframes again and right-click. Select “Keyframe Assistant” and then “Easy Ease”.

Your transition is now complete! We hope this post has helped you. If you have any questions, feel free to contact us at any time.
Our Internet Agency Munich, Econcess, places great importance on vibrant design to appeal to a wide range of customers. If you are interested in a project for your company, please feel free to contact us. We specialize in customized solutions and offer you professional support in implementing your digital projects.