


To expand our know-how as an internet agency regarding the possibilities of website creation, we have now installed the Coachie Template Kit, which is edited using the Elementor page builder.
Coachie is a WordPress template that can only be used in conjunction with the Elementor page builder. The advantage of such a page builder is that no programming knowledge is required to create a website. At the same time, however, the configuration options of the website are limited to the functionality provided by the page builder.
The following explains how to install Template Kits for the Elementor page builder, as this is not possible using the usual method.
To install Template Kits for Elementor, the “Template Kit Import” plug-in must first be installed. To do this, navigate to Plugins > Add New. You can then search for the corresponding plug-in using the search bar and install and activate it.
On a fresh WordPress installation, Template Kit Import should work without any problems. In our case, however, problems occurred when using the plug-in due to qTranslate, another plug-in that was already installed. Since qTranslate was not required for this project, it could be deactivated. Template Kit Import then worked perfectly.
Before the Template Kit can be installed, it must first be downloaded. The downloaded ZIP file can then be installed under Tools > Template Kit. To do this, click on the square labeled “Upload Template Kit ZIP File” and select the corresponding file.
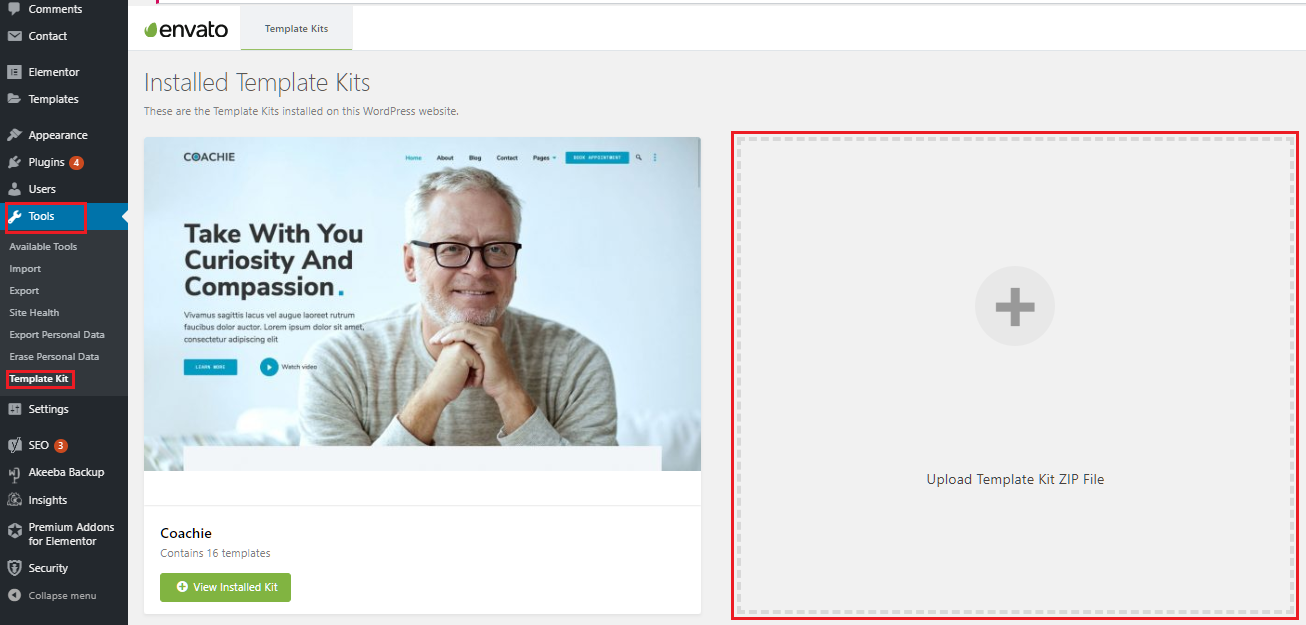
After clicking on the installed Template Kit, an orange bar with the “Install requirements” button should appear above it.

In the next step, this button must be clicked to open a notification. It displays all missing settings and plug-ins required to use the Template Kit. (In our case, the Elementor plug-ins were already installed, so only one setting had to be installed.)
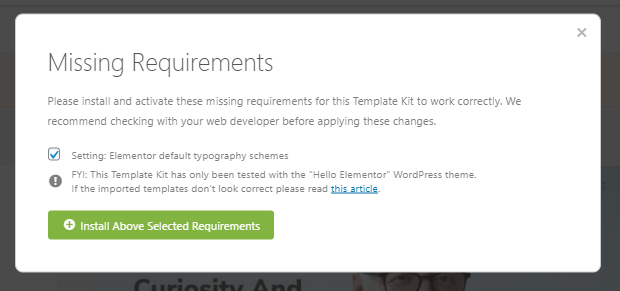
Once “Install Above Selected Requirements” is clicked, they are installed automatically. This means that you do not have to search for and install each one manually.
The individual templates now also need to be installed. To do this, click the green Import button below each template.

You can then find them in the WordPress menu under Templates > Saved Templates.
The imported templates are categorized, but headers and footers are not automatically recognized as such. Therefore, they must be assigned separately. To do this, go to ElementKit > Header Footer in the menu. At the top, next to the “Templates” heading, there is a button called “Add New”. Clicking it opens a configuration.
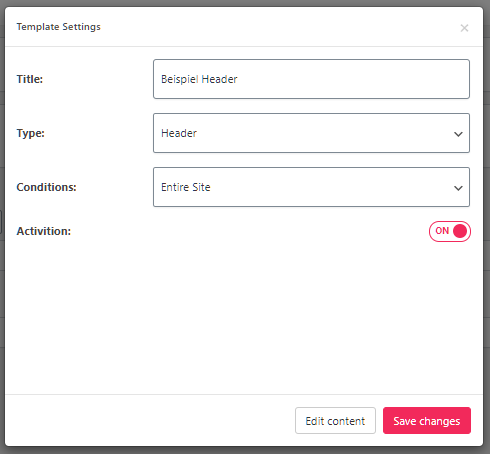
Here, the name of the header must be specified. The header is activated by switching the toggle from off to on. The configuration can then be completed by clicking the Save Changes button.
To assign the template to the newly created header, it must be edited with Elementor. To do this, click “Edit with Elementor” below the name of the header you just created. The Elementor interface will then open. To insert the header template, select the folder icon in the center of the workspace.

Under “My Templates”, you will find all imported templates. Now simply select the header and insert it using the green Insert button.
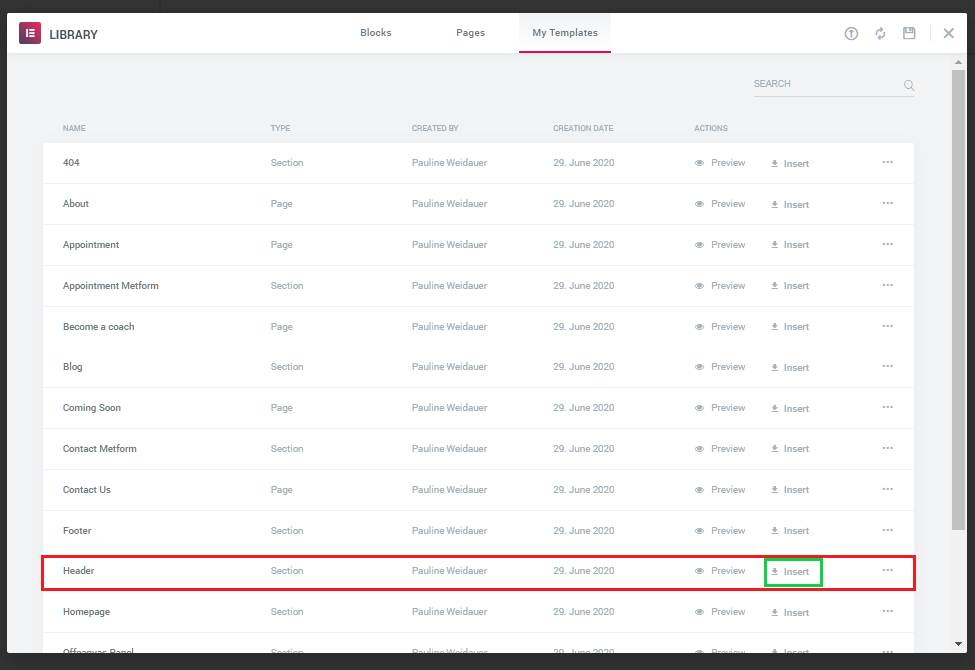
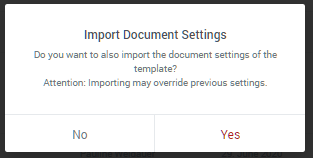
Once “Insert” has been clicked, a message will appear asking whether the settings of the document being imported should also be applied. “Yes” should be selected if the header is to have the same structure as in the template.
Finally, to save the changes, click the green Upload button at the bottom left, next to the workspace.
Importing the footers works in exactly the same way as importing the header. The only difference is that Footer must be selected instead of Header in the configuration under “Type”.
This completes the basic installation of the Template Kit, and the imported templates can now be edited using Elementor.
Tested in our agency using WordPress 5.4.2.